Wednesday, March 31, 2010

Camera + GPS (built-in) = GeoTagged Images

In December 2008, I purchased a Nikon (Coolpix) P6000 - a consumer point-and-shoot camera with a built-in GPS.  I finally decided to part with my $500 as I was preparing for a trip to Africa and didn't want to lug around a camera AND a GPS and bother with hoping I could link photo and location later.

A great little camera, this 13MP camera has a zoom lens, video capacity, and several preset and user-set modes for shooting.  If you plan for field studies with your students and you have the budget, I'd highly recommend you take a look at this camera, still available in most camera shops that carry Nikon gear (or Amazon). The photo below was taken with the P6000 and geotagged as I took the photo!


My cautionary notes:
  • The GPS eats the barrery - fast.  Bring a second battery along for a day long outing ith kids.
  • On my camera, the automatic lens shield has trouble fully opening and fully closing on occassion, particularly when the air is very humid (tropical).
  • The P6000 isn't the most rugued camera with built-in GPS.  Be careful!  Consider the Ricoh 500SE, if you need a ruggedized camera or one that is "GIS friendly".

    Lastly, recently Samsung has also released a GPS-enabled 12.2MP camera.  Although I haven't used it, it may be right for you and your students.  It's half the price of the Nikon!

    Thursday, March 25, 2010

    Using the iPhone to Collect Data for GIS

    Charlie Fitzpatrick of the ESRI Education Team, recently posted a great blog on, as you might guess, collecting location data with the iPhone and displaying it in ArcGIS Explorer. 

    "Like most iPhone users, I delight in picking up "new" uses for it. When away from home, I use my phone's built-in GPS to track my morning run and get me back safely. Last week, I rode the train from DC to Philadelphia to exhibit at a conference for science teachers. As I sat down on the train, I decided to follow our progress."

    Read more at the ESRI Education Community Blog

    Friday, March 19, 2010

    Geotagging at the National Conference on Science Ed - NSTA 2010 Philly


    Taking a bit of advice from this very blog, I decided to geotag my trip to the 2010 National Conference on Science Education in Philadelphia, PA. To help me keep up with it all, Anita Palmer also contributed several images

    I'm using an iPhone and PixelPipe and occasionally, a Nikon P6000 (with built-in GPS) to record my images and post to Google's Picasa Web Albums. The iPhone can use either its GPS or cellular triangulation.  As many of these photos are being taken indoors, it seems that most of the positioning info is coming from the cellular triangulation.  I seem to keep "clumps" of pictures that are pretty close, but not spot-on.  As a result, I'm tweaking the position of many of these pictures, using Picasa Web Albums.

    Since I'm geotagging and posting these images in (mostly) real time, each time you visit the gallery you should see new pics.  Granted, the conference itself may not provide a wealth of geography across which my pictures can post, but hopefully I'll see a few sites while in Philly and add those to the map as well.

    • 2010 National Conference on Science Education geotagging project [ images | map-based ]
    If you would like to contribute to this gallery, email your geotagged photos to:  trbaker.nsta2010@picasaweb.com by Sunday, March 21 (6pm EDT). Include your name and description.


      Thursday, March 18, 2010

      Geocaching with an iPhone

      Do you or your students carry iPhones or iTouches? Probably, since the word on the street is that 25% or more of the country's middle school kids carry one. If you are an avid geocacher, or still a muggle but interested in learning, read on to learn about this fun, outdoor activity!

      Geocaching is a high-tech scavenger hunt that uses coordinates to navigate to a hidden treasure, or geocache. Before iPhones, a geocacher needed to purchase a GPS receiver in order to geocache. Now, you can download one of many apps to your iPhone and go on your first hunt. There area couple geocaching apps out there, but I like the Geocaching App from Groundspeak. The app does cost a few dollars, but it's a lot less than buying an expensive GPS. Once you have downloaded the app and registered on geocaching.com for your free membership, you are ready to go!

      The app itself is self-explanatory. In order to find nearby caches, you will have to allow it to use your current location. This is how I find most of my caches--I just go to a park and tell my app to "Find Nearby Geocaches" and up comes a list of all the caches, from the closest on out.

      You will then choose from the list which geocache you want to find, and a page with all the "specs" for that cache will come up. It will tell you how far the cache is, and give a description and hints to finding the cache. When you are ready to find your treasure, just hit "Navigate to Cache" and a map like the one below will come up.
      The balloon is the cache while the blue dot is you and the line of arrows is the path you will take to find the cache. If you hit the road button underneath the "View Compass" button, you can choose the type of map you prefer to use.
      This app is nice because it connects directly to the geocaching.com website, meaning you will have access to thousands of caches all over the world. You can add specific caches to your favorites list, make field notes while caching, and look up a hint if you are having trouble finding a cache. There's even a compass setting to help you get your bearings if you are caching in an unfamiliar place. All in all, a very useful tool for a very fun activity. Happy Geocaching!!

      Wednesday, March 17, 2010

      GeoTagging with your own iPhone:Using PixelPipe

      Editorial Note: Pixel Pipe no longer transmits the location of the image at the time it was taken but rather the location at the time the image was transmitted.  Pixel Pipe can still be a useful tool for students, if that can transmit the images immediately after taking them. (06/23/2010)

      If you are a lone geotagger with an iPhone, you have many options (iPhone apps) for publishing your pics to the web.

      I've experimented with a few photo-sharing applications, but I seem to keep coming back to PixelPipe, a service and an application for publishing pictures to a number of photo-sharing websites. PixelPipe's website boasts, "Publish photos, video, audio, text and files on over 100 online destinations and counting...".  It is impressive!  PixelPipe can run on Apple iPhones, Google Androids, Palm Pres, and several others. They've also created photo-sharing apps (or plug-ins) for: Firefox, Picasa, Google Talk and more.

      Basically, you stick a PixelPipe application on any of the devices or tools above, configure through the web interface one time, and then press "Upload".  Depending on how you've configured PixelPipe, your photos can publish to one or a hundred different websites - at the touch of a single button.  It's very powerful - and free.

      This is a great way for the solo geotagger to make quick work of publishing images to a photo-sharing website that supports geotagged images, like Flickr or Picasa Web Albums. You can even tie PixelPipe to your Twitter account to automatically tweet about your newly uploaded pics.

      The screenshots above are from PixelPipe running on an iPhone 3GS (publishing to Picasa Web Albums). Enjoy!

      Tuesday, March 16, 2010

      GeoTagging with student iPhones and Picasa Web Album

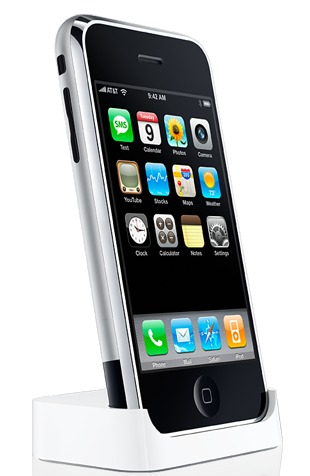
      GeoTagging with an Apple iPhone 3GS is an absolute snap!  With a camera and GPS built-in, you just point-and-shoot.  The challenge can be transfering these geotagged images to an online service that maps your pics. However, using the "email feature" in Picasa Web Album resolves this issue quite handily.

      Why an iPhone?
      Apple iPhones have gained rapid and dramatic market share in consumer mobile devices.  This trend may be the most evident among kids and young adults.  My own informal polling of students, teachers, and principals leads me to suspect that anywhere from 25% to 50% of middle schools students are carrying one of these devices.  While many of these students have pages of apps and the Apple data plan, few of them can buy an app.  For teachers, this means that potentially 50% of students in your class are carrying their own data collecting device that will geotag images.  Students can email the geotagged images directly from the iPhone to Picasa Web Albums, after making a few tweaks in Picasa.

      Setting up your classroom Picasa Web Album
      1. If you don't already have a Google account your use for the classroom, create one.
      2. Login to your classroom account and head to Picasa Web Albums
      3. Click on "Settings" in the upper-right corner.
      4. On the "General" tab, check the box next to "Upload photos by email" and note the special email address you're given. after entering a secret word (usually an @picasaweb.com address).
      5. Now, when your students take a geotagged photo, they just email it to this address. 
      6. These emailed photos will appear in a "Drop Box" folder and will need to be moved to another public folding of your choice.

      Steps for classroom activities
      1. Students use the built-in iPhone camera app to take a geotagged photo.
      2. Students share the photo by emailing it to the address, provided by Picasa.
      3. You (teachers) will need to move the photos to a new album.
      4. Students can then comment on their photos, contributing any other attribute information collected during the study.

      What a great way to empower students, engaging them with their tools and tech, while extending classroom and collaborative data collection!  Share your thoughts or experience below. 

      Monday, March 15, 2010

      A few safety tips for students when publishing to the web

      You have an obligation to watch out for K-12 students as they contribute to any mapping or blog for school. Remember:

      • never have students use last names on photos or communications

      • foster children may not be legally permitted to contribute to any web site...check your state laws

      • seriously consider having students place their work in a shared folder where you can review their work before you upload it

      • check that you are following your school district's guidelines for student work published on the web

      • alert parents to the project you are doing to make certain they have no questions about the project

      Thursday, March 11, 2010

      Where are your #Twitter followers? GeoTweeters


      Twitter is a micro-blogging website and data channel that allows users to post short (140 char) status updates.  Over time, most Twitter users gather followers, who read your posts.  With Twitter, users have the option of setting their location. 

      Thanks to an ArcGIS Server application, you can take a look at where your Twitter followers are locatedt.  In the future, we'll explore Twitter geotagging, tagging each Twitter post with your current location.

      -Tom on Twitter

      Wednesday, March 10, 2010

      GeoTagging in your everyday life: Spring Break

      One great way to start geotagging is to geotag pictures from a vacation or special event.  The zoo, amusement park, county fair, or park are excellent places to "practice" geotagging.  Photographically, you can shoot interesting subjects that vary across geography.

      As Spring Break nears, consider geotagging your photos from a trip or vacation, at least the ones you're willing to share.  It's another opportunity to create some exciting maps from your own adventures!  I had the extremely good fortune of traveling to Africa in 2008.  As the trip grew near, one of the first things I did was purchase a new camera, the Nikon P6000 - an excellent point-and-shoot camera (more on the P6000 in the future).  The interesting feature of the P6000 is that it has an onboard GPS, geotagging the photos with highly accurate positioning information as the pictures are taken (very cool).  Keep in mind a simple digital camera and a GPS is all you really need.  Just jot down the lat/long along with each picture number in a logbook, as you shoot.

      Feel free to explore my one day adventure into Lilongwe National Park, Zambia, Dec 25, 2008.  Share your geotagged trip URLs below and enjoy that Spring Break!

      Monday, March 8, 2010

      Questioning and exploring with geotagged images using Flickr

      The popular photo-sharing site Flickr (owned by Yahoo!) allows you to upload, organize, and map your favorite images.  Flickr allows users to geotag their images and has about 100 million geotagged at the moment.  That collection of photos is a massive database, waiting for you and your students to explore - and question.

      The ability to use the map search to find certain images in a geographic area (or to see how  a phenomena varies across geography) is certainly one of the most instructionally relevant parts of this site.

      For earth science and physical geography teachers, there are questions and photos, a plenty!
      • How does volcano shape vary geographically?  [map]
      • What factors might affect damage from earthquakes? [map]
      • What can be learned about the structure and composition of rock around the world? [map]
      Social studies, history, and anthropology learners have equally intriguing options:
      • Does culture and geography effect the shape of our cities? [map]
      • What does our clothing say about who we are and where we live? [map]
      • Do our monuments say more about our past or our present? [map]
      What questions can you ask that can be (at least in part) answered by exploring others' geotagged images?  Share your ideas by commenting to this post.

      Saturday, March 6, 2010

      GeoTagging at GeoTech 2010

      presented by Shannon White & Tom Baker


      Exploring Websites:

      Devices:

      Download Sample Pics:
      Download the following compressed file (.zip) and uncompress to your desktop.  Click the link to download this file from Google Docs.

      Desktop Software (PC):


        Friday, March 5, 2010

        Microsoft Pro Photo Tools: A brief introduction

        If you like to take several photos on outings with your students and you carry a GPS, there's a great free tool from Microft (PC-only), Pro Photo Tools 2. Pro Photo Tools allows you to edit the metadata (contained in JPG headers called EXIF data).  You can edit the title, description, dates, categories, and much more.  It also allows you to view, rotate, map/geotag, and transfer photos from camera to PC.  Pro Photo Tools requires an Internet connection in order to preform any geotagging.

        Pro Photo Tools allows you to geotag pics in three basic ways:
        1. Drag the picture and drop it on a map
        2. Geocode (calculate a lat/long based on street address) the picture, based on street address
        3. Import a GPS Track log and determine each photo's location based on where the GPS was at the time the picture was taken.  This process requires you to synchronize your camera and GPS clocks.
         Unfortunately, Pro Photo Tools will not allow you to type in a lat-long and assign it to a photo.  You must use one of the three options above. However, the geocoding (address to lat/long) and reverse geocoding (lat/long to address) are excellent features to support geotagging - as are the Bing maps.

        We'll explore specific features of Microsoft Pro Photo Tools 2 in future blogs.  For now, you're on your own to explore or check out some of the featured articles.

        Thursday, March 4, 2010

        ArcGIS Explorer: Viewer for geotagged images in schools

        ArcGIS Explorer (2009 release), a free virtual globe from ESRI, is an excellent tool for displaying your geotagged photos on a globe.  It's powerful tools and clearn interface/data layers make it a great option for PC classrooms.

        If you already have a collection of geotagged images, perhaps using a tool like www.geoImgr.com, there are three easy steps to mapping nirvana.

        1. Download and install ArcGIS Explorer (PC only)
        2. Download and Open the "Add Photo" Add-in [info]
        3. Run the add-in and you'll see a new "Add-ins" tab in ArcGIS Explorer. Under the tab you will see the "Add Photo" add-in with an easy-to-follow wizard.

        After you've added your geotagged photos, ArcGIS Explorer will create clickable thumbnails of your images, correctly placed on the globe.  The ArcGIS Explorer globe is is draped with beautiful Earth imagery - with no ads or irrelevant "community" content.  although ArcGIS Explorer will not geotag your images, it's a great way to show them off!

        Wednesday, March 3, 2010

        Keeping it simple: the GeoImgr website

        One of my favorite, easy-to-use websites is at http://geoImgr.com.

        The site allows you to upload a JPG image up to 5MB in size.  To geotag your image
        1. Press "Browse" and find your image.  Double-click it or press the "OK" button to load the image to the server.  If you use a large image, this could take some time as the image actually copies to the server.
        2. Drag-and-drop the map and zoom in as needed to get the most accurate location on the map.  Double click to move the marker to your map center.
        3. Press the "Tag Photo!" button.
        4. Press the "Download Photo!" button to save your image back to your computer.  The image now has the lat-long data written to the header (or EXIF) data of the image.

        That's it!  It's a great, simple tool, especially for geotagging single images.  No software to install and no complexities!

        Tuesday, March 2, 2010

        GeoTagging Videos in YouTube

        YouTube supports geotagged videos (geocoded location & elevation) during upload or later when editing video metadata. 

        When you geotag your content, it can be found in geographic searches.  Although searching geographically is not the most straight-forward process, it can be useful.  To search geographically, select the  "Search Options" link beneath the search box, then click "Additional Search Optinos".  Text-based or map-based (drag-and-drop) searching is possible.

        Examples:
        The options are limitless.  Just be sure to do a little searching before class to ensure you get the results you want and be sure to geotag your educational YouTube content today!

        Monday, March 1, 2010

        Turning on Your Maps in PicasaWeb Albums

        By default, Google's Picasaweb Albums doesn't display your photos on a public map, even if the photos are geotagged.  If you want the public to see your map-based photos: 

        1. Login to PicasaWeb 
        2. Click "Settings" in the upper right corner
        3. Select the "Privacy & Permissions" tab
        4. Click the relevant items in the "Locations" area.
        These few steps will let anyone who can see your gallery, see your geotagged images on a map as well.